Scheme of works for using a scanner, digital camera and Photoshop Course Summer 2004
Lesson 1
Introduction and induction
Discussing the advantages and disadvantages of using a digital camera
What to think about when getting a digital camera
Starting Photoshop.
An overview of the screen
Make a new file, scribble a bit, then close Photoshop
The basics of how a digital camera works
Common features of digital cameras.
Protecting the lens / camera / use the strap and lens cap
End of lesson 1
Lesson 2
Digital camera section
Digital camera section
Taking pictures
Locking down
Photoshop section
A resolution to understand Pixels (Picture elements) get students to
create a 10 pixel image then define it to print at A4 then do the same
with different size pictures. Demonstrate then try out.
The toolbox and its sections
The options toolbar.
Using TAB
Using F key
Using shift and TAB
Creating a new file - basic
Defining how big the "canvas is"
Selecting the basic drawing tools
Changing brushes
Changing colours
Changing opacity
Drawing
Using the magnifying class to zoom in
Double clicking on the hand and magnifying glass icons to change the view
Undo and history
Saving the image at different points by using "Save as"
Understanding different file types
End of lesson 2
Lesson 3
Digital camera section
Working without the flash
Loading pictures on to a PC using a card reader
Photoshop section
The different palette windows > moving them around and switching them in to groups.
Erasing
Defining a custom workspace
Adjusting contrast using contrast function and levels function
Adjusting hue / saturation and lightness.

And now with a hue adjustment

The rotate image function
End of lesson 3
Selecting a piece of text from a web page:
1 ...Click once anywhere on this line , or anywhere just above the beginning of the text you want to select
2 ...Then scroll to the end of this lesson.
3 ...Hold down the shift button then click on the line that's red and says
4 ..."click here while holding down the shift key".
Lesson 4
Digital Camera
Managing pictures ( Deleting, protecting, making copies, creating subfolders)
Formatting Vs deletion
Basics of taking photos ..... This includes:
What to think about when taking a picture
Looking at the edge of the frame
Keeping both eyes open
Composition
Taking portraits. Close up?
Lighting
Landscapes and detail.
Photoshop Section
Recap last week
The Dock
Opening files the normal way and then using the file browser (basic) and then using the drag and drop technique
The free transform function
Selection menu and basic techniques
Painting basics
Making shapes
End of lesson 4
"click here while holding down the shift key"
Lesson 5
Digital Camera section
An exercise in depth of field in relation to portrait photography. Using the lock down technique take a picture of someone in the class, make sure the focus is on their face, and if possible open up the aperture as wide as possible, then take some shots.
An explanation of "depth of field"
See the following links for further reading
1 Depth of field simplified or this one
2 Medium Depth of field explanation
3 Technical http://www.normankoren.com/Tutorials/MTF6.html

An example of depth of field in action
Composition 2 (divisions of an area - The golden mean rule, left to right rule, the directions subjects look in.) further reading link 1

The direction in which a subject looks influences how the composition
works, in this example the figure on the right "bounces" the
onlookers gaze back to the figure on the left, who in turn focuses our
attention on her eyes and face.
Photoshop section
Selection techniques
To do anything (change, delete, filter etc... ) either a part or all of an image one must firstly select the area
Selection techniques using the selection drop down menu and the selection section of the toolbox.
Inverse selection, deselecting, selecting all
Deleting selections
Adding to and cutting out selections using the shift and ALT keys.
Filling and stroking
Multiple selections
The lasso, polygon lasso and the magnetic lasso
End of lesson 5
Lesson 6
Using a digital camera section

Group pictures, a problem of resolution? If you need the details of peoples faces your camera may not be able to capture such fine details. Always set your resolution to as high as possible for group pictures. It might be worth using a higher quality file format such as TIFF or RAW for important group shots.

If you use low resolution settings the individual faces may appear blocky
when you zoom in to look at them

To see the other group photos taken during this lesson click here
Creating a safe haven for your photos on your hard drive. Making files read only. Learning to save a version of a picture as soon as you bring it out of your "Safe haven" folder.
Photoshop section
Copy and paste
Contrast and brightness
hue and saturation
End of lesson 6

Want to blend images together? Then you'll have to wait till after half
term!!!
Lesson 7
Digital camera section
Managing pictures ( Making copies, creating subfolders)
Be aware that some cameras allow you to create folders on your memory card, you may also be able to make copies of pictures which are set at a different resolution to the original. This is useful if you are running out of storage space and need to take more pictures. Firstly delete unwanted pictures, secondly lower the resolution of any pictures you may take from then on during that session. - Check out other ways to lower the amount of memory a picture takes up, settings such as quality and compression will also have an effect - . If you're still lacking storage space you might be able to use the copy function. If you do so, save the new one at a much lower resolution. For instance you may have a picture that doesn't need to be saved at high resolution - approx. 2400 x 1600 - so you make a copy which is 600 x 400 and then delete the original. By doing this you'll have gained enough space to shoot 15 pictures at 600 x 400. A useful feature in emergency situations.
Putting a zoom feature to use
Firstly if your camera has a digital zoom avoid using that feature. If it has both an optical and a digital one then try to only use the optical one. A digital zoom is just an enlargement of a part of the ccd chip that senses the image in your camera, you may as well crop your image and enlarge it in photoshop than use a digital zoom.
If you have an optical zoom however it can be put to many uses. The first one is to zoom in on things that are distant, but it can also be put to less obvious uses. Firstly when wanting to take a close up of someone's face you'll find that if you hold a camera too close it will distort their features and will probably be hard to focus. Holding things close to your eyes makes the things look bigger, the closer they get the larger they look, we all know this - hopefully -. From your eye to about a foot away you will see the most dramatic effect. Therefore if you have a person's nose 7 inches away from a camera lens and their eye is 8.5 inches away the nose will look disproportionately bigger than it should in relation to the eye. The face may even look like a caricature. If you want to overcome this then step away from your subject and frame your picture around their face using your zoom, it'll be far less likely to distort their features.
There is an area between around 3 foot and 1 foot from your camera that many cameras find hard to focus on. If this happens move away from your subject and use your zoom to get the close up you require.
When zooming less light comes in to the camera. The speed of a lens denotes how much light it can let in, a faster lens will be able to zoom in on subjects in darker situations than a slower lens. Remember if you're not able to get enough light to take a picture try zooming out, you might find more light comes through the lens.
If you take a picture using a flash you might find that being close up to a subject washes out (over exposes) the image, if that's likely to happen take a picture from further away using the zoom, that way the luminosity caused by the flash won't be so intense.
Flash guns
For those of you who wish to get into photography in some depth:
Does your camera have an interface for an add on flash device? This will either be a plug in socket for a "flash cable" or a slide on socket known as a "hot shoe". If you can add a flash gun you'll find a bounce head one can allow flash photos to be taken with a far more subtle effect.
Photoshop section
Colour range select tool
This technique is particularly useful when you have an area that's got lots of things in front of it, such as sky or a wall might have.
Sometimes you'll have an area, or multiple areas of a picture that consist of a colour range. For example a sky is often of a similar hue, so if you wanted to select the sky this feature might be useful. Go to the "select" drop down menu and choose "Color range". A window will appear. Choose the pipette with a plus sign next to it and start clicking on the area you want to select in the picture. A black and white image will show you what area will be included in the selection. If too large or small an area gets selected adjust the fuzziness slider and see if that has a positive effect. When the area you want to select is shown in the preview window to have turned white click on "ok". If you find extra selections outside of the area you want have also been selected you can tidy up the selection by using the lasso or polygon or rectangular marquee while holding down the ALT key to de-select those areas. If certain areas within the area you want to select are not selected use the selection tools while holding down the SHIFT key to get rid of them.
The "Replace Colour" function
Here's an orange house
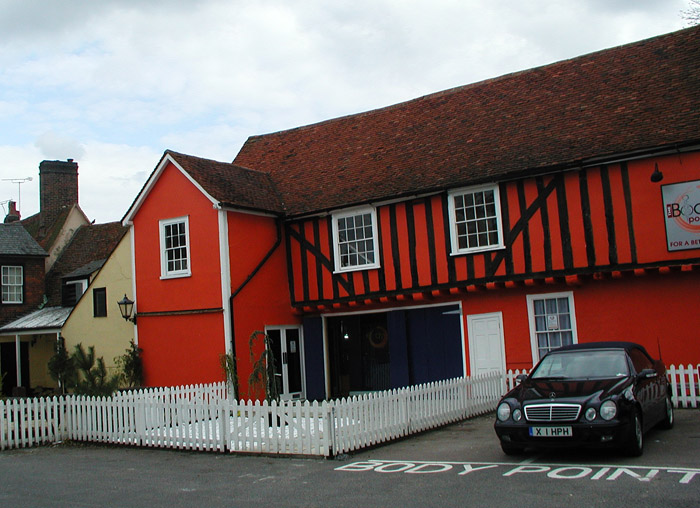
Have a go at changing the colour of the house using the
replace colour tool. (Image > Adjustments > Replace colour)
If other areas of thepicture change colour too then either select the
area you want to use before using the replace colour function or lower
the fuzziness setting in the replace color options box.
During lesson 7 the following topics were put forward as areas to cover over the next 5 weeks.
1 preparing images for e-mail, printing, third party printing, handouts, slide shows, and archives
2 Backing up on to CDs and DVDs
3 Dealing with red eye
4 Picture restoration
5 Adding Text
6 Improving composition
7 Putting pictures in to Word and other applications
8 Further understanding of file types
9 Practical projects
End of lesson 7
Lesson 8
Introduction to scanning images
Quick history of scanners
Mention hand held - including pen scanners -, drum and flat bed - also pass through (such as fax machines) .
Mention different interfaces, different pass modes, speeds, and extras such as slide / film negative functions, sheet feeders, expandable tops.
"Resolution and bits". Interpolation
Uses. make a lst with the group of uses.
What is TWAIN
TWAIN is a widely-used program that lets you scan an image (using a scanner) directly into the application (such as PhotoShop) where you want to work with the image. Without TWAIN, you would have to close an application that was open, open a special application to receive the image, and then move the image to the application where you wanted to work with it. The TWAIN driver runs between an application and the scanner hardware. TWAIN usually comes as part of the software package you get when you buy a scanner. It's also integrated into PhotoShop and similar image manipulation programs.
The software was developed by a work group from major scanner manufacturers and scanning software developers and is now an industry standard. In several accounts, TWAIN was an acronym developed playfully from "technology without an important name." However, the TWAIN Working Group says that after the name chosen originally turned out to be already trademarked, an 11th hour meeting of the group came up with TWAIN, deriving it from the saying "Ne'er the twain shall meet," because the program sits between the driver and the application. The name is not intended to be an acronym.
Digital Camera section
Macro mode
Composition : Positioning of the horizon line - Angle And height.
Panoramic shots
Using the crop technique

Panoramic camera or special lens? No just a crop of the image below

The canvas size function in Photoshop allows you to make more space around an image so you can insert images next to it.So for example this technique can be used for panoramic images as you can see below.

Photoshop Section
The history tool - Don't forget it!!!
The Canvas Size and image size
Introduction to panorama pictures - using either the crop feature or putting two or more pictures together
A quick introduction to Filters

Here's an example of the "motion blur" filter

Here's a picture after the Watercolour filter has been applied
End of lesson 8
Lesson 9
Digital Camera
Exposure compensation (Exposure Values) - Bracketing - 5
Composition
The importance of empty spaces and blocks of colour / texture 5
Practical exercise
You may need to make several attempts at the following before you get a shot you're happy with.
1 Take a standard head and shoulders shot of someone in the class. Pay attention to the background. 5
2 Take an "arty" portrait of someone in the class. 5
Once you have got the shots you like we shall download them to my laptop and review them. 15
here are sme of the photos taken during this session


(So far 1:15 hours)
Photoshop course
Our first glance at layers 10
Introduction to the text tool - notice text appears on it's own layer at first 10
The clone tool 10Archiving
Introduction to "burning" files - pictures- on to a CD 15
2 hours
End of lesson 9
Lesson 10
Digital Camera section
Video functions - resolution - time span / memory - making a vcd using Nero - 20
Video taken during class (try right clicking on this link and using the "save target as" option.)
Do you just want a series of postcards or can you make pictures of scenes more interesting by either adding subjects or making more dramatic images? 10
Photoshop
Colour modes - this links back to scanners 5
Why don't the colours print out as they do on the screen - negative and positive colour mixing - RGB Vs CMYK, optimizing one's monitor for printing - Have I ever bothered? No 5
Printing optimisation for printing 5
optimisation for multimedia display, e-mail and the Internet.5
Transform functions 10
Blur tool 10
The Unsharpen filter Want to know more then click on this link10
Lesson 11
Scanning an image
Installing a scanner 5
The TWAIN interface - comon features - preview - clear,
scan, resolution colour mode, selection tool.
Other features may include a flip and zoom function. 10
Start by thinking about the end output, what do you aim to do with the image? 5
Resolution and colour modes - "line art", greyscale, and colour. 5
Scanning reflective surfaces - 2
Read about Moire here 3
Problems with too large or too small an image. 3
7minute break (so far 40 minutes)
The rest of this lesson will focus on out-putting images in varied forms. e.g. Printed, email, web, video, cd, on line galleries, on line notice boards. Yahoo photo-album and Yahoo briefcase www.geocities.com free web site space and building tools
http://www.microsoft.com/windows/plus/dme/try.asp
here's a sample slide show for you to, well, sample
The Extract filter
Creating montages
Recap of Selection techniques. Shift or ALT, adding to
and subtracting from selections.
Marquee, lasso, polygon, magnetic, quick masks and the magic wand.
Print screen function - can over come copy protection
Archiving - detailed and backing up to a removable storage medium such as a CD or DVD 20
Lesson 12
Recap of whole course including some exercises
Intermediate course ideas
Healing and patch tool
double layer blending
copying and pasting and blending options
changing backgrounds
Dissipating Flash
Starting Photoshop by creating shortcuts, pinning to the start menu, creating a keyboard start key,
Layer masks
Using a pen
Brushes - advanced
Quick masks
Layer Masks
Gradient masks
Text -advanced
Layers - advanced
Batch processing
Understanding histograms
Actions